GPIO Manager

Every smart home setup enables, in one way or another, for the users to login remotely even when they are not at home. The aim was to do exactly that – create a mini smart home hub powered by a DragonBoard 410c.
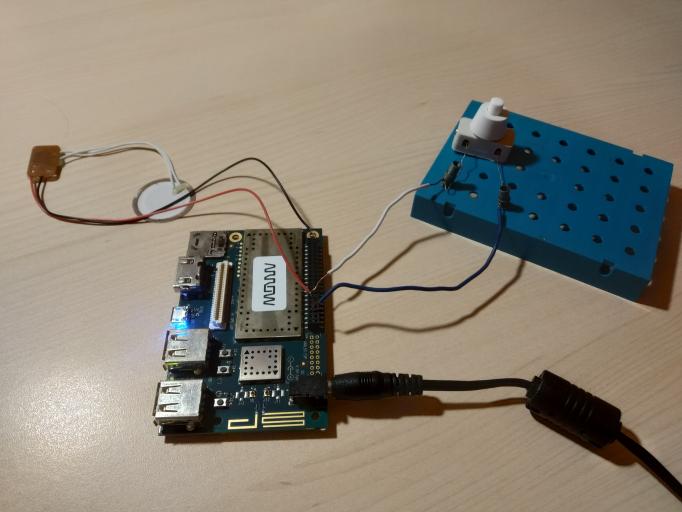
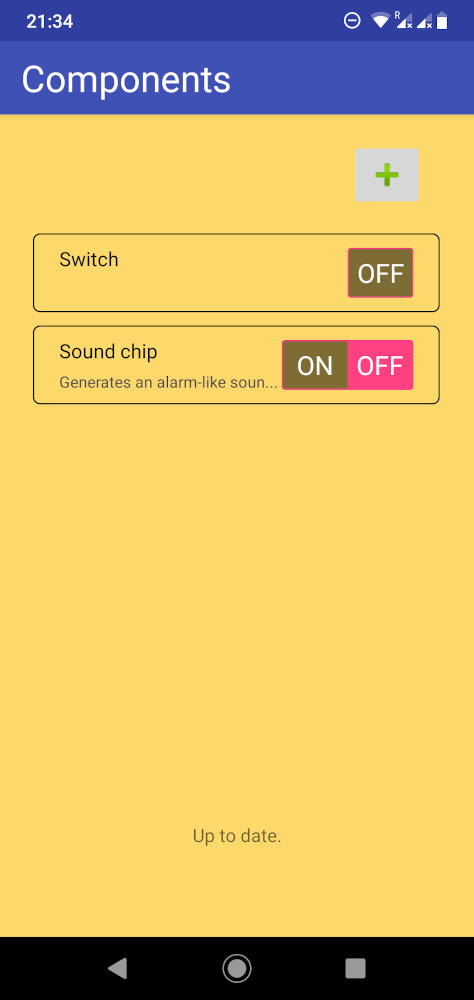
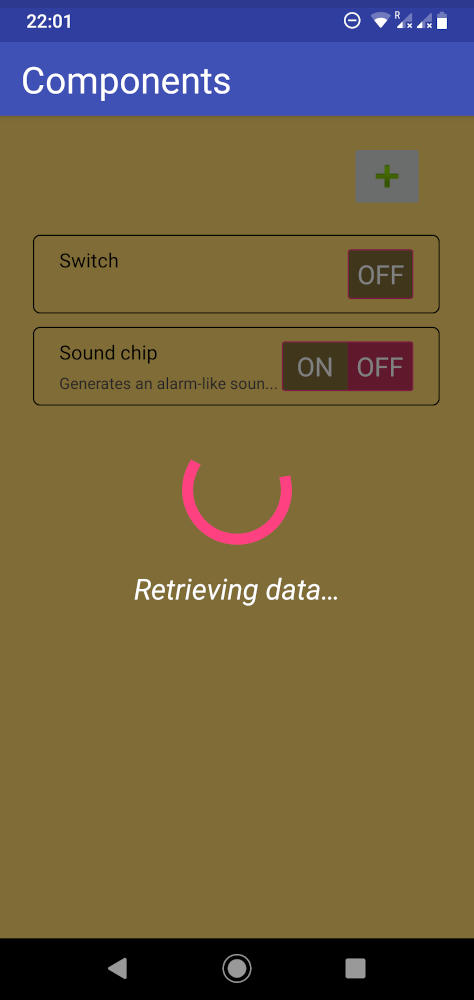
This project is a first step towards that and enables remote control of the General Purpose Input/Output (GPIO) pins of the DragonBoard 410c. But rather than having just a shell interface, achieved with an SSH connection to the board, I wanted to make the controls as user-friendly as possible. Thus, I created an Android app that enables the users to login, add and remove devices, and see their status.
The app connects to the server running on the DragonBoard 410c through an Ngrok tunnel, which can be configured in the app settings. Users need to login to prevent public access to the hub. The system allows any number of users to be logged in to the same hub, and they will all be seeing the same devices and their status as expected. The devices information updates automatically for all users; for example, if one user registers a new devices this device will be immediately visible to other logged in users, as well.
With UI not being my greatest passion, I focused on the app backend and server side of the system to make it as clean and as scalable as possible. I described some of the features that enable this below.
GPIO module interface
GPIOs are most easily managed through the shell interface. To enable my server to execute
the correct commands, I created a module that defined a Gpio.js class for interfacing with
GPIOs via simple function calls. This module turned out to be very useful in my other
projects, as well, so I decided to publish it into my Snippets repository. I also converted it to a C++
module to extend its usability. Both versions
are published here.
Server CLI module
When running and debugging the server, I needed a way to correctly stop the server so that all the ports would be closed, all cached data would be saved. On top of that, I did not want to see all the output all the time and I also did not want to restart the server in order to change the granularity of the output. Therefore, I created a Command Line Interface (CLI) module which allows for any part of the program to subscribe their own commands for a user to use.
How it works: a module can call a function to register a command to the CLI module and
specify a callback for that command. For example, a components-manager module
registers a command components, which prints all the currently registered devices on GPIOs to the
terminal, with a call to cli.registerCommand("components", printComponents);.
Whenever a user types "components" to the server terminal (STDIN) the server will print the
current state of GPIO devices.
What's more, multiple modules can register their own callbacks for the same command. The CLI
module then executes all callbacks and waits for all of them to complete before prompting for
the next command. For example, both main.js
and socket-setup.js
module register their own
callbacks to the "stop" command which is used to stop the server. The former takes care
of disconnecting the Ngrok tunnel and the latter disconnects the Socket.IO server.
This CLI module is also available in my Snippets repository.
Java subscription system
When designing the Android app, I wanted to separate the UI from the backend as much as possible.
Thus, I created a ServerConnection class that runs on a separate thread and is responsible for
sending and receiving requests to and from the server running on the DragonBoard 410c.
I used a singleton design pattern so that all other classes can access the same instance.
This class has three special events – "connected", "disconnected" and "components changed" events. The first two are triggered when a connection with server is established or dropped, and can be use, for example, by UI to disable input when the server is not connected. The later event is triggered by the server whenever one of the following happens: a new device is registered, a device is removed, a device is updated by any user, or a device status changes (for sensor-like devices such as switches). This enables the UI to update in real time for all users. A UI controller class subscribes to these events with using lambdas, as seen here. Only one controller can be subscribed to these events at a time, because only one activity needs to update its UI at time.
A similar mechanism is implemented for the requests that need to be sent to the server – I called
it request scheduling. Whenever a user enters an input in any activity, the data is sent
to the ServerConnection class together with the request code (so the server knows what type of
request to generate). Any number of requests can be scheduled at any time and they will be sent
to the server in order they were scheduled. Upon the response from the server, the ServerConnection
class triggers appropriate response listener that was defined by a UI controller when the
request was scheduled.
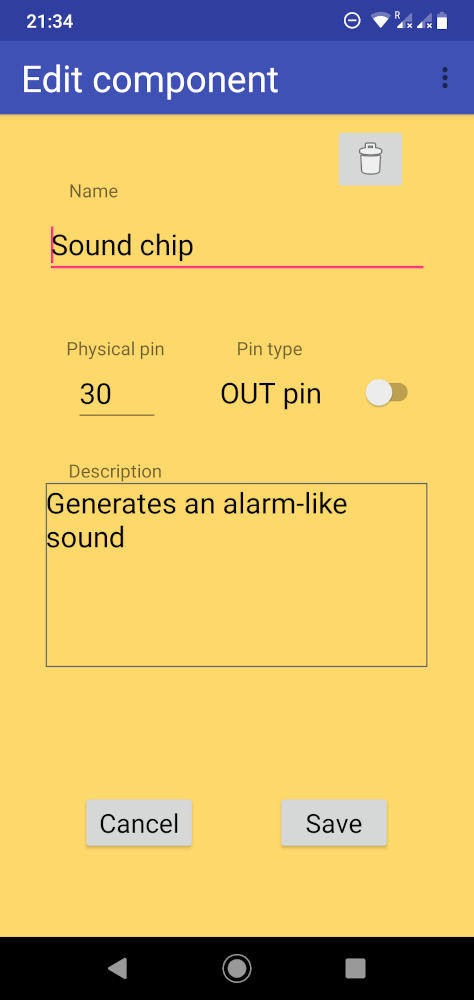
Example: EditComponentController class is used to control the activity where users can edit
an existing component. When the user submits the new component information, this class collects
the data from the input fields and schedules a new "update component" request as seen here.
At the same time, this class also needs to register a ResponseListener as a lambda, that will
process the data received from the server. In this case, the controller returns to the components
screen and creates a Toast message to notify the user if the update was successful or not.
With such design, all the code for UI updates was written in UI controller classes while all the request processing and connectivity logic was implemented in the separate backend package.
The code for the Android app and instructions on how to run it can be found
here.
The code for the server that needs to run on the DragonBoard 410c and its setup
instructions can be found here.